
 We have new neighbors!
Since moving is always such a tedious and stressful time, I like to put together a little package to welcome new neighbors when they settle in. Over the last week, we had two sets of neighbors move in to the houses on each side of us! I made some Rice Krispy Treats and stacked them up in large cellophane treat bags. I thought it would be cute to make a couple gift bags to dress up the packaging a little.
Paper gift bags are actually super simple to put together and can be done quickly once you get the hang of it. They can be used for anything from gifting to party favors. And the best part is that they can be completely customized.

These little bags can be made from just about any kind of paper but I love using a pretty printed card stock. I found this card stock stack at my local craft store. It's usually $19.99 for 48 sheets but I picked this one up when it was on sale for $6.99! Some of the sheets have glitter and foil for added dimension and texture, which look great on any project. The only downside I found with these particular sheets is that they don't score quite as neatly. It didn't make too much a difference with this project though. If you want to make your own paper gift bags, here is a quick and easy tutorial.
 Paper Gift Bag Tutorial
 For this project, you'll need:
*Paper (I'm using a 12x12 piece of printed card stock for
the bag and smaller card stock to make the tag)
*Scissors or a paper cutter (Pinking shears can also add
some fun detail.)
*Hole punch
*Ribbon
*Double-sided adhesive roller (Tape or glue will also
work.)
*Tag and/or Embellishments

Start by cutting across the top edge of your paper. I used pinking shears to create a scalloped edge but you can keep yours straight if you prefer.

Fold and score this edge down to create the top of your bag. This is where double-sided card stock would be adorable! It adds a fun contrast to the top of your bag. I kind of wish I had used it myself on this one but the white looks great too. As I mentioned, these bags are customizable, so the dimensions of your completed bag will depend on the measurements you use on your folds. For the top, I made my fold 1 3/4 inches.

Next, flip your paper over, fold and score each side to the center, overlapping about 1/8 of an inch. Using your double-sided adhesive, tape or glue, secure these flaps closed to create the back of your bag.
Now we're going to make the bottom of the bag.


Fold and score the bottom up towards the top. This bottom fold is going to determine the width of your bag so the larger the fold, the wider the bag. I made mine 1 3/4 inches. Open the fold, press your finger into one of the corners and flatten it open, creating an even triangle. Do the same on the other side. Now take each edge and fold up towards the center, overlapping about 1/8 of an inch. Secure closed with your double-sided adhesive, tape or glue.
 Open the top of your bag and pop the folds out from the inside with your hand to establish the bottom. From here, hold the base of your bag and invert the score in the center of each side. Gently pinch from the bottom up, creating the edges of each side of your bag.
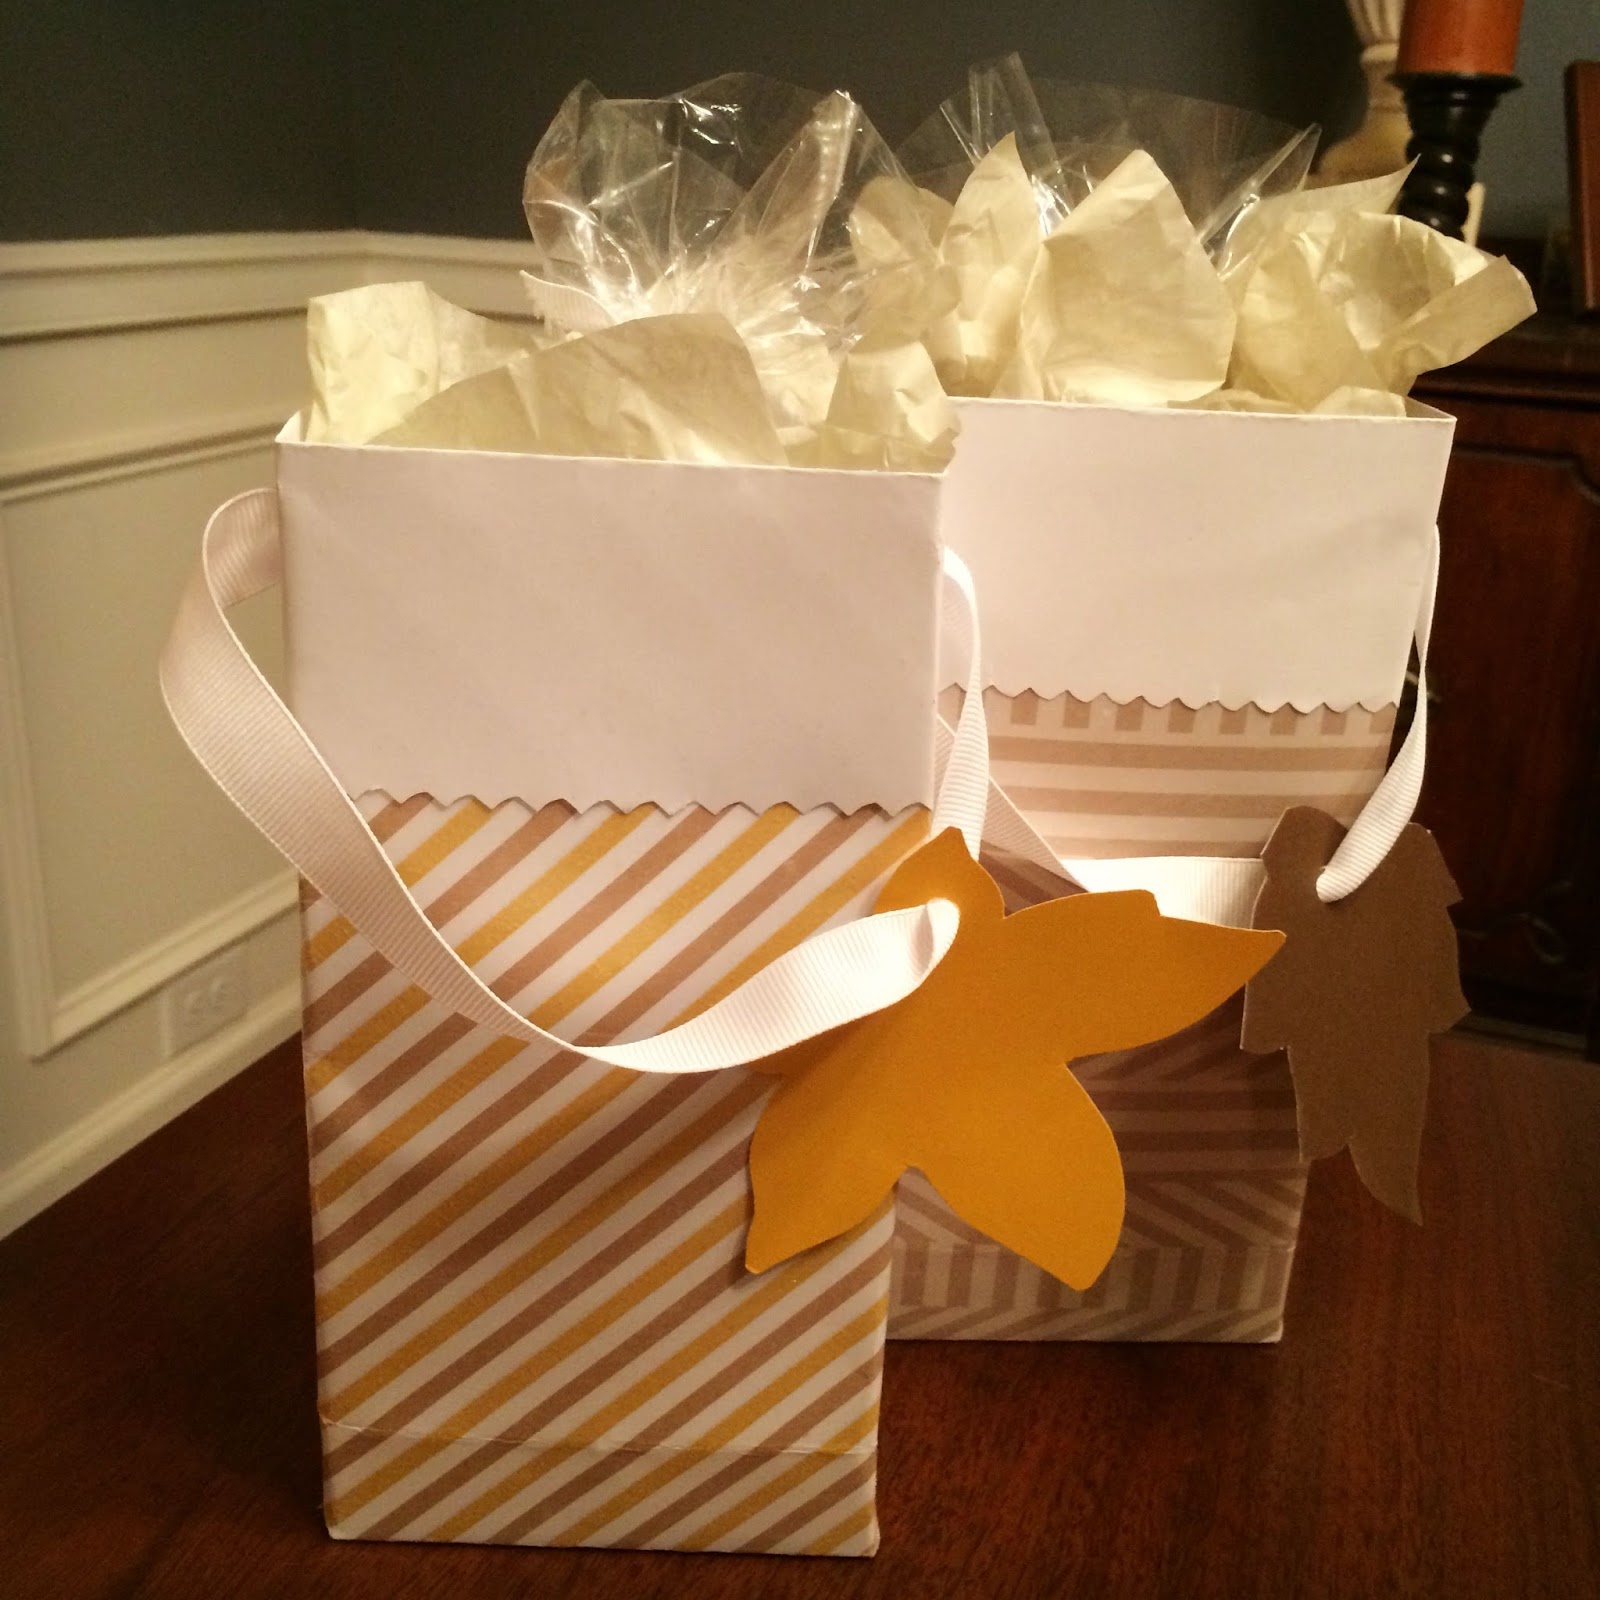
 At this point, you can add a tag or embellish with whatever you would like. I wanted to make leaf-shaped tags for my bags. You could probably find a leaf template online but because I didn't want to have to search for one and print it out, I grabbed a leaf from the yard, traced it and cut it out. Can't get more of an authentic leaf shape than that, right?
 Now you can decide how you would like your handle(s) to look. I chose a
1/2 inch white grosgrain ribbon which I attached on the sides. To do
this, punch a small hole about 1/2 inch from the top on each side of the
bag and tie the ribbon through, securing with a knot. Don't forget to
add your tag before knotting the other side!
Now you can decide how you would like your handle(s) to look. I chose a
1/2 inch white grosgrain ribbon which I attached on the sides. To do
this, punch a small hole about 1/2 inch from the top on each side of the
bag and tie the ribbon through, securing with a knot. Don't forget to
add your tag before knotting the other side!You could also make a double handled bag by punching two holes equally apart on both the front and back of the bag, again securing the ribbon inside with knots.
And that's it! Your cute little bag is ready to be filled with anything you like! Once you make one, you'll find you can throw one together in no time. You could make them for gifts, classroom treats, party favors- just about anything!

I hope our new neighbors enjoy their treats and feel welcome in our neighborhood! Maybe it will help ease the news of having four kids aged 1-7 in the house next to them...maybe.


And once your new neighbors meet your family, they will be happy they moved in!
ReplyDeleteFingers crossed!
DeleteLove these!!
ReplyDeleteThank you!
Delete